Why Every Garden Needs a Decorative Walking Path (And How to Build One)
A garden path is more than a way to move from one place to another. When designed correctly, it becomes a functional structure, a visual anchor, and a long-term investment in the health of your garden. Many gardeners focus only on plants, soil, and watering systems, but overlook how movement through the garden affects everything from plant growth to daily maintenance.
Below you will discover why adding a structured path is one of the smartest upgrades you can make, how to build a durable version step by step, and two alternative construction methods that work just as well without using decorative stones.
Why a Proper Garden Path Is Worth Building
1. It Protects Your Soil Structure
Walking directly on garden soil compresses it. Over time, this reduces oxygen levels, slows root development, and limits water absorption. A dedicated path keeps foot traffic where it belongs and preserves loose, healthy soil in your growing areas.
2. It Improves Drainage and Prevents Mud
Without a path, rainy days turn gardens into slippery, muddy zones. A raised or reinforced walkway allows water to pass through while keeping your shoes clean and your plants undisturbed.
3. It Makes Daily Work Easier
Harvesting, pruning, watering, and pest control become faster and more comfortable when you can move safely between beds. A solid path reduces strain on your knees, ankles, and back.
4. It Adds Visual Structure
Paths guide the eye and give your garden a sense of order. Even simple designs make the space feel intentional and professionally planned.
5. It Increases Property Appeal
Well-built garden paths increase the perceived value of your outdoor space. They create a “finished” look that potential buyers and visitors instantly notice.
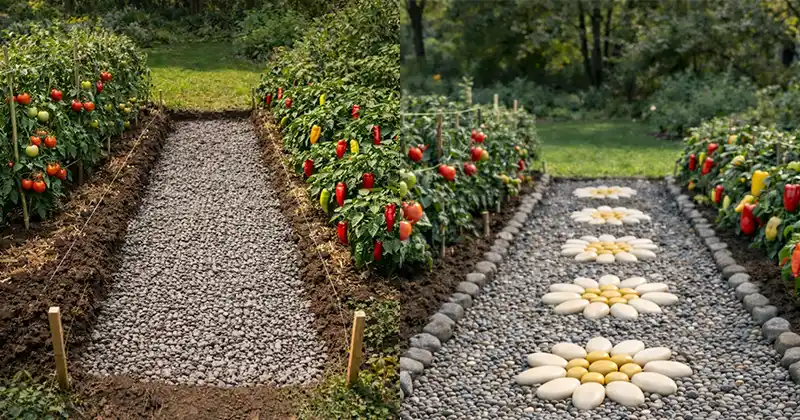
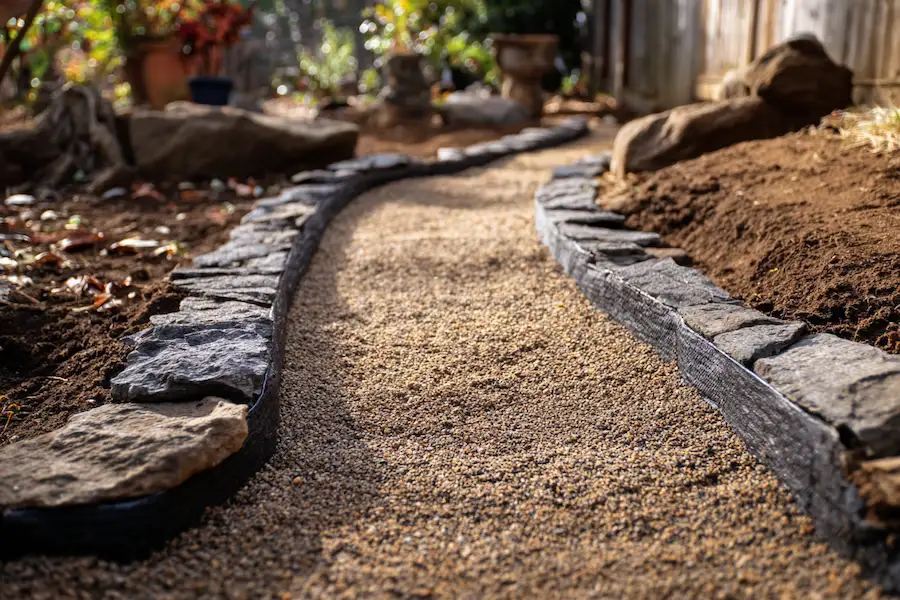
How to Build a Durable Decorative Garden Path (Step by Step)
This method creates a flat, stable path that lasts for many years and stays safe to walk on.
Materials Needed
- Shovel
- Landscape fabric
- Crushed gravel (base layer)
- Small decorative stones or pebbles (top layer)
- Edging stones, wood, or metal borders
- Rubber mallet or hand tamper
- Level
Step 1: Mark the Path
Use string or garden stakes to outline the exact width and direction. A width of 50–70 cm is ideal for comfortable walking.
Step 2: Dig the Base
Excavate about 10–15 cm deep along the entire path. Remove roots and compact the soil lightly.
Step 3: Install Landscape Fabric
Lay fabric across the trench to prevent weeds from growing upward and to keep stones from sinking into the soil.
Step 4: Add the Gravel Foundation
Pour 6–8 cm of crushed gravel. Spread evenly and compact firmly using a hand tamper. This layer provides stability and drainage.
Step 5: Create the Decorative Surface
Add a 3–5 cm layer of smaller stones or pebbles. Level carefully so everything sits flush and smooth. Compact gently.
Step 6: Install Edging
Border the path with stones, bricks, metal, or treated wood to prevent spreading and erosion.
Step 7: Final Leveling
Use a straight board or level to ensure the surface is flat and safe to walk on. Adjust where needed.
Two Alternative Garden Path Designs (No Decorative Stones Required)
If stones are not your preference or are difficult to source, these options work just as well.
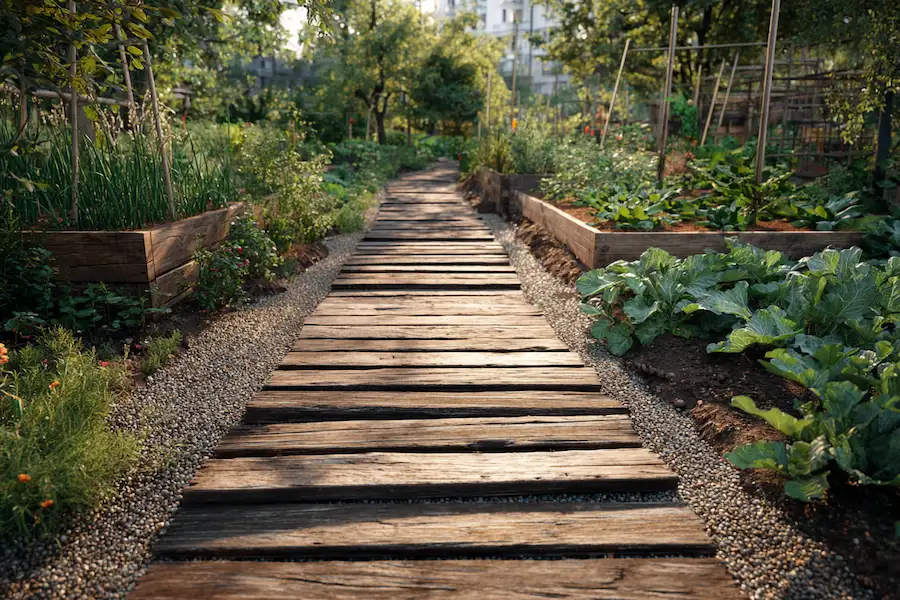
Option 1: Wooden Boardwalk Path
A natural and warm solution, especially for vegetable gardens.
Materials
- Pressure-treated wood planks or hardwood
- Wooden beams for base supports
- Screws
- Gravel for base
Basic Method
- Dig a shallow trench.
- Add a thin gravel layer for drainage.
- Place wooden beams as supports.
- Screw planks across the top.
Advantages
- Comfortable to walk on
- Easy to repair
- Excellent for wet or clay soil
Disadvantages
- Needs sealing every 1–2 years
- Shorter lifespan than stone
Option 2: Compacted Gravel and Sand Path
A minimalist, budget-friendly option.
Materials
- Crushed gravel
- Coarse sand
- Landscape fabric
- Edging material
Basic Method
- Dig 10 cm deep.
- Add fabric.
- Fill with compacted gravel.
- Top with sand and level.
Advantages
- Very affordable
- Quick to install
- Excellent drainage
Disadvantages
- Needs occasional re-leveling
- Less decorative
Maintenance Tips for Any Path Type
- Re-level once per year
- Remove weeds early
- Rinse dirt buildup occasionally
- Replace damaged edging
A garden path is not just decoration—it is infrastructure. It protects your soil, simplifies your work, and brings harmony to your outdoor space. Whether you choose a decorative stone design, a wooden walkway, or a compacted gravel solution, the result will be a cleaner, more functional, and more enjoyable garden for years to come.
If you invest a weekend into building one, you will benefit every single season that follows.