Seed Snails: A Space-Saving Way to Start Strong, Healthy Seedlings
Starting seeds indoors is exciting, but it can quickly turn into a mess of trays, pots, labels, and crowded windowsills. When every flat surface is covered with seedlings, it becomes harder to water, rotate, and care for them properly. A smart alternative is a simple method often called a seed snail: a rolled strip filled with moist growing mix, with seeds sown along the top of the spiral.
This approach is practical, tidy, and surprisingly effective. It uses less potting mix than traditional trays, takes up far less room, and makes transplanting much easier because the seedlings can be separated with minimal root disturbance. It also works for a wide range of crops, from leafy greens and brassicas to tomatoes, sweet peas, peppers, and even corn when made in a deeper size.
If you want a low-cost, flexible seed-starting system that is easy to make from materials you may already have at home, this method is well worth trying.
What Is a Seed Snail?
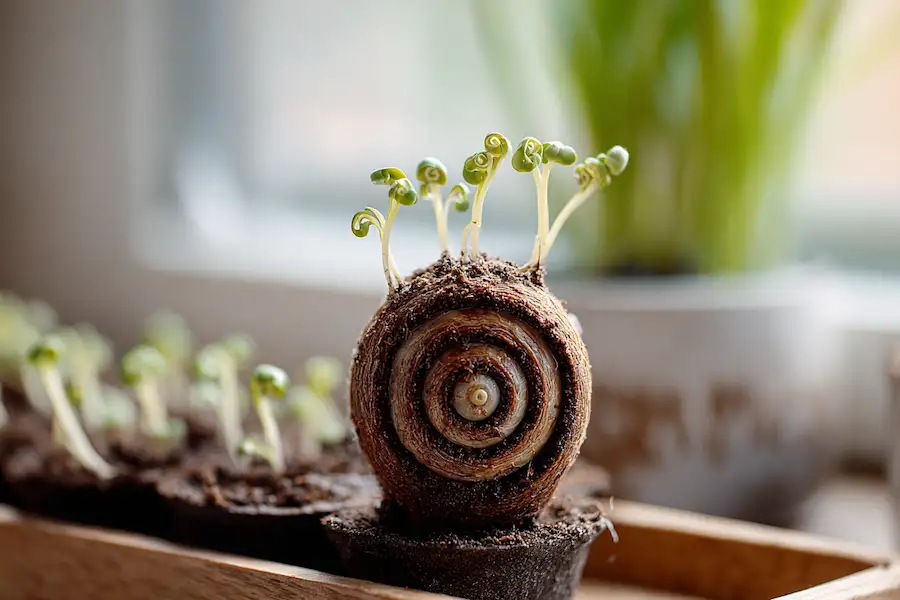
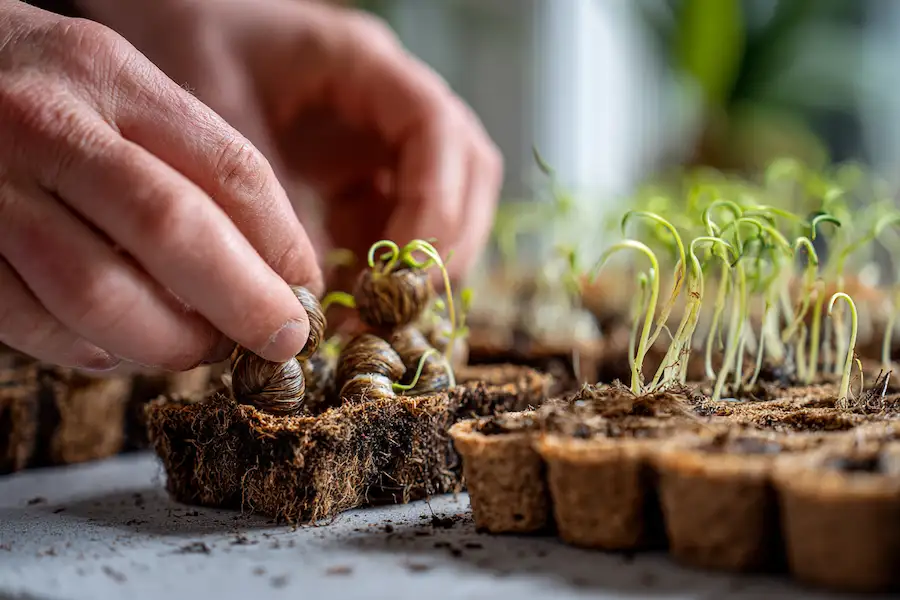
A seed snail is a strip of flexible material rolled into a spiral with damp seed-starting mix inside. Once the roll is standing upright, seeds are placed along the exposed top edge and lightly covered. As the seedlings grow, their roots travel downward through the column of growing medium, creating long, healthy root systems in a surprisingly compact space.
Instead of filling multiple pots or plug trays, you can fit many seedlings into one upright roll. This makes it especially useful in early spring, when indoor growing space is often limited.
Why This Method Works So Well
There are several reasons gardeners enjoy using seed snails:
They save space.
A few upright rolls can hold a large number of seedlings in the same footprint that would normally fit only a couple of trays.
They use less potting mix.
You only add enough mix to form the roll, so there is less waste and lower cost.
They make transplanting easier.
When it is time to pot on or separate seedlings, you simply unroll the spiral and lift the seedlings apart.
They encourage deep roots.
Because the growing column is vertical, roots naturally grow downward, which can help create strong young plants.
They can be made from reused materials.
This is a good way to repurpose packaging materials before recycling them.
Materials You Can Use
The outer layer of a seed snail needs to be flexible enough to roll and sturdy enough to hold damp growing mix. Several options work well:
Bubble wrap or bubble plastic is a popular choice because it is flexible, holds its shape nicely, and provides a little insulation against temperature swings. It can also be rinsed, dried, and reused.
Baking parchment as a liner can be added if you want the growing mix and roots separated from plastic. Simply fold the parchment around the plastic before adding the mix.
Corrugated cardboard can work for quick-growing seedlings. It is less durable than plastic-based materials, but it may last long enough for crops that move on quickly.
Avoid very flimsy paper materials that tear easily when wet or allow roots to grow through too early.
How to Make a Seed Snail
1. Cut your strip
Cut a strip of your chosen material.
A good general size is:
- Height: about 3 inches / 7 cm for smaller-rooted crops
- Height: 6 inches / 15 cm or more for larger seedlings like beans, sweet peas, or corn
- Length: roughly 1 to 2 feet / 30 to 60 cm
The taller the strip, the deeper the root run. The longer the strip, the more seedlings it can hold.
2. Prepare the potting mix
Use an all-purpose seed-starting or fine potting mix that is suitable for seedlings. Moisten it before using. It should feel evenly damp, not dripping wet. When squeezed in your hand, it should hold together with only a slight hint of moisture.
Pre-moistening is important because it helps the mix stay evenly hydrated inside the roll and makes assembly easier.
3. Spread the mix
Lay the strip flat and spread the damp mix along it, leaving a little space free at one end so the roll can be closed neatly.
Depth guidelines:
- About 1/2 inch / 1 cm for small seeds such as lettuce, basil, onions, or brassicas
- Up to 2 inches / 5 cm for larger seeds such as squash or other vigorous seedlings
Press the mix lightly so it is snug and fairly even, especially near the bottom edge, which will become the base of the standing roll.
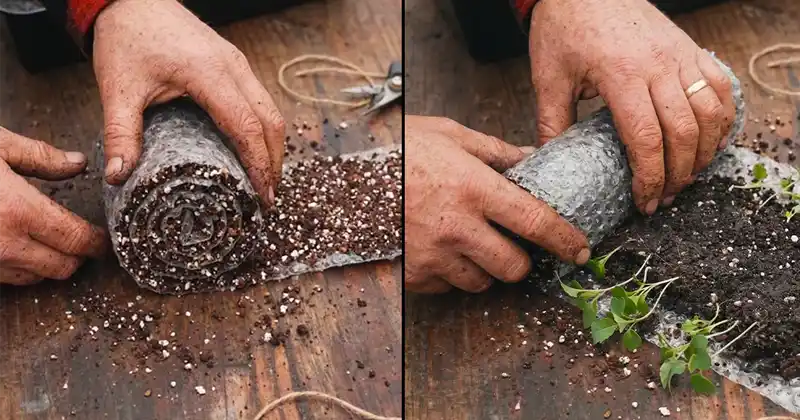
4. Roll it up
Starting from one end, roll the strip gently but firmly into a spiral. Stand it upright once rolled and secure it with masking tape, painter’s tape, or elastic bands depending on the material.
At this point, the seed snail should feel compact and stable enough to stand in a tray.
How to Sow Seeds in the Roll
Always sow after the roll has been made and secured. If you sow before rolling, the seeds may shift and end up too deep, too shallow, or unevenly spaced.
For small seeds, sprinkle or place them along the top of the spiral, spacing them according to the crop. Cover lightly with a finer layer of seed-starting mix.
For larger seeds, make individual holes with a dibber, pencil, or fingertip and place one seed per hole.
Mist or water gently after sowing so the top layer settles around the seeds.
Best Crops for Seed Snails
This method is especially useful for crops that transplant well and benefit from early indoor sowing.
Good choices include:
- Tomatoes
- Peppers
- Lettuce
- Leeks
- Onions
- Cabbage, kale, broccoli, and other brassicas
- Sweet peas
- Corn
Deeper rolls are better for plants that appreciate more root space early on. Smaller, shallower rolls are fine for compact seedlings that will be moved on sooner.
Watering and Care
Because seed snails contain less potting mix than a standard pot, they need a bit more attention when it comes to moisture. Check them regularly and keep the top evenly moist while seeds are germinating.
You can help retain humidity by:
- placing the rolls in a tray close together for support
- covering small-seeded crops loosely with a clear bag during germination
- setting them inside an unheated propagator or humidity dome
The goal is not necessarily extra warmth, but steadier moisture.
Once seedlings emerge, give them bright light and continue watering carefully. Avoid letting the rolls dry out completely.
How to Pot On Seedlings
One of the biggest advantages of this method appears when the seedlings are ready for more room.
Simply remove the tape or bands and gently unroll the seed snail. The seedlings will be lined up along the strip with their roots growing downward. Because they are arranged side by side instead of packed into a tight pot, they are often much easier to separate.
At this stage you can:
Add more mix and re-roll if the seedlings only need a little extra growing time.
Transfer them into a larger seed snail with wider spacing for crops like tomatoes that are not yet ready for their final position.
Pot them up individually into modules or pots.
Move cold-hardy seedlings outdoors to continue growing in protected conditions if the weather allows.
A Simple Method With Big Benefits
Seed snails offer an efficient and satisfying way to raise seedlings without filling your growing area with trays and pots. They are compact, economical, and adaptable, and they make handling young plants much simpler when it is time to move them on.
For gardeners with limited indoor space, this method can make seed starting far more manageable. And even for those with plenty of room, it is a neat, low-waste system that is easy to repeat throughout the season.
If you are looking for a practical way to start more seeds in less space while still producing healthy, well-rooted plants, seed snails are an excellent technique to add to your routine.