The Best Way to Upcycle Pruned Branches Into a Free Garden Trellis
Every spring, pruning season leaves behind a mountain of branches. Most gardeners bundle them for pickup, burn them, or haul them away. But what if those “waste” sticks were actually free building material?
With a little creativity, you can transform pruned branches into a beautiful, rustic trellis that looks like something straight out of an English cottage garden. Instead of spending hundreds of dollars at a garden center, you can build your own natural structure—completely free.
Here’s how to do it step by step.
Step 1: Treat Your Pruned Branches Like Free Lumber
After pruning trees or shrubs, sort through the pile before discarding anything.
Look for:
- Straight branches (as long as possible)
- Thicker, sturdy pieces (for posts)
- Flexible but strong thinner branches (for weaving)
- Pieces roughly thumb-thick for lattice work
Hardwoods tend to last longer outdoors, but almost any sturdy branch can work for a seasonal or semi-permanent structure.
Tip: Trim off side shoots and leaves to create clean, workable poles.
Instead of seeing “yard waste,” start seeing building material.
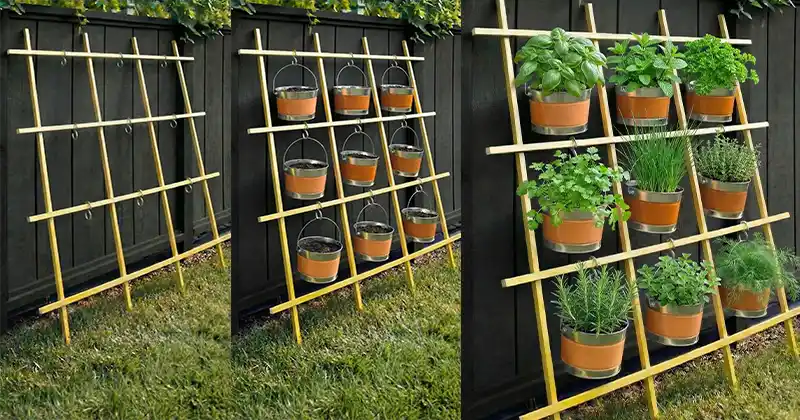
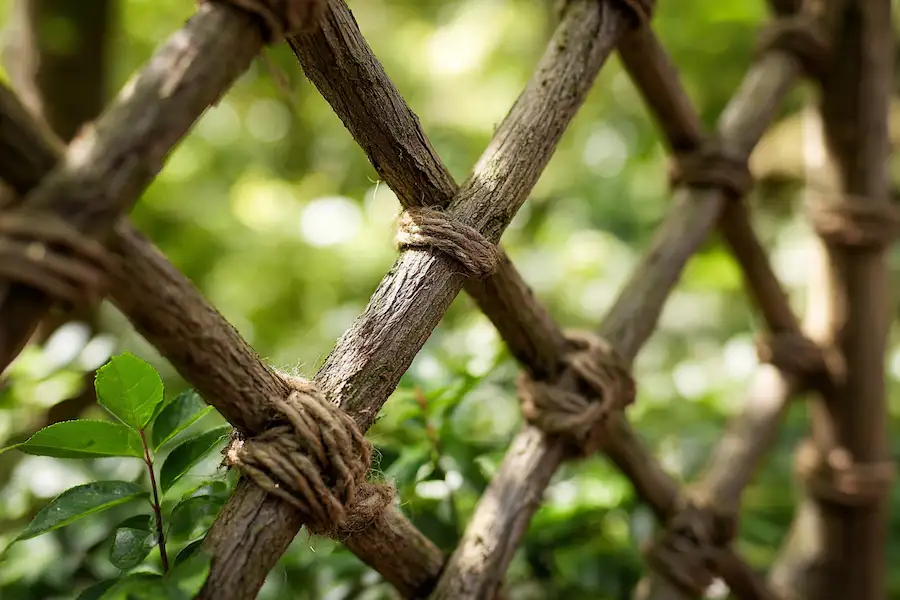
Step 2: Build a Nail-Free Structure With Simple Lashing
You don’t need screws, nails, or power tools.
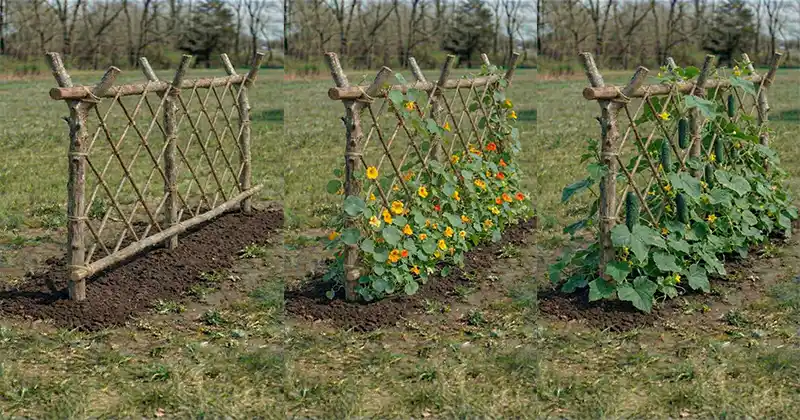
This trellis works using a classic diamond lattice design, which distributes weight evenly and provides excellent climbing support for vines.
What You’ll Need:
- 3–4 thick branches (for vertical posts)
- 8–20 thinner branches (depending on width)
- Natural twine or jute rope
- A mallet or hammer
- Garden shears
How to Assemble:
- Drive the Posts Into the Ground
- Space them evenly (about 2–4 feet apart).
- Hammer them 8–12 inches into the soil for stability.
- Lay the First Diagonal Layer
- Angle thinner branches across the posts.
- Lash each intersection tightly using twine.
- Add the Opposite Diagonal
- Weave branches in the opposite direction to create a diamond pattern.
- Tie each crossing point securely.
The beauty of this design is flexibility. Unlike rigid metal trellises that can snap or bend permanently, this woven branch structure flexes with the wind.
It’s surprisingly strong—and completely natural.
Step 3: Kill Grass Without Digging (Sheet Mulching Method)
Before planting, you need to eliminate grass and weeds beneath the trellis.
Instead of digging (which is exhausting and disrupts soil life), use sheet mulching.
How to Do It:
- Lay plain cardboard directly over the grass.
- Overlap edges so no light gets through.
- Wet it thoroughly.
- Add compost or soil on top.
- Finish with mulch.
The cardboard blocks sunlight and smothers existing grass almost immediately. Over time, it breaks down and feeds the soil beneath.
This method:
- Saves your back
- Improves soil health
- Prevents weed competition
- Retains moisture
It’s one of the easiest ways to create a clean planting bed.
Step 4: Plant Fast-Growing Vines for Instant Impact
Once your trellis is secure and the base is prepared, it’s time to plant.
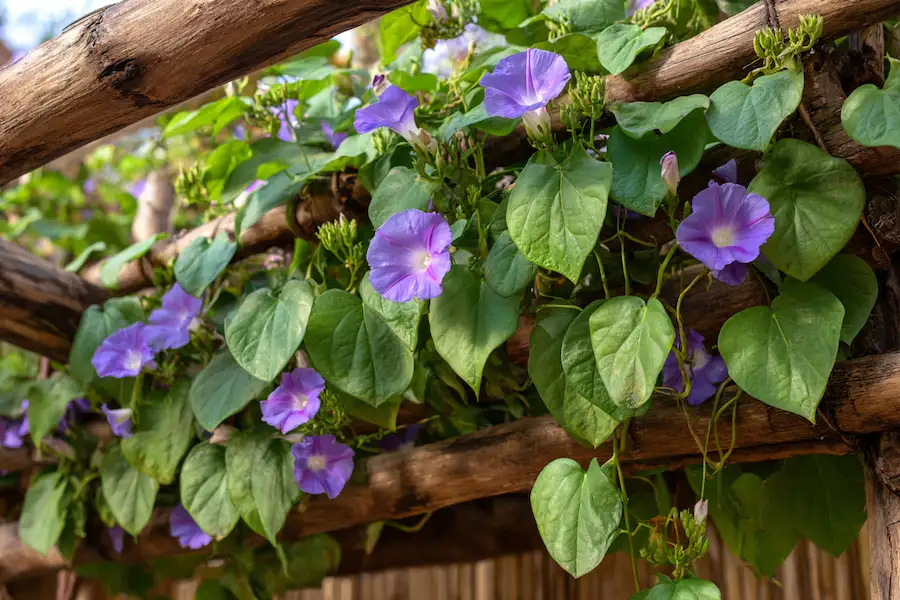
One of the best options for quick coverage is Morning Glory.
Morning glories are:
- Fast-growing
- Easy to germinate
- Perfect for vertical spaces
- Loved by pollinators
Within a few months, the bare sticks disappear behind lush, heart-shaped leaves and vibrant blooms.
Other great climbing options include:
- Sweet peas
- Climbing beans
- Nasturtiums
- Clematis
- Cucumbers (for edible gardens)
Choose annuals for quick seasonal coverage or perennials for a long-term living wall.
Step 5: Turn It Into a Living Privacy Screen
One of the biggest benefits of this DIY trellis is privacy.
If you have:
- A see-through wire fence
- A chain-link boundary
- An open side yard
- A visible patio
This natural structure can transform it into a dense, green wall.
As vines mature, they:
- Block unwanted views
- Reduce wind exposure
- Provide shade
- Attract bees and butterflies
- Add cottage-style charm
Instead of a harsh fence line, you get a soft, living boundary that feels intentional and beautiful.
Why This DIY Trellis Is Better Than Store-Bought
✔ Costs nothing
✔ Uses materials you already have
✔ No hardware required
✔ Eco-friendly and biodegradable
✔ Blends naturally into the landscape
✔ Customizable in height and width
Store-bought trellises often look uniform and artificial. A branch-built trellis has character. Each piece tells a story of your own garden.
How Long Will It Last?
That depends on the wood type and climate.
- Softwood branches may last 1–2 seasons.
- Hardwoods can last several years.
- Replacing individual pieces is easy and free.
Even if it only lasts a season, you can rebuild it every spring from new prunings.
And that’s the beauty of it.
Spring pruning doesn’t have to create waste.
With a few straight branches, some twine, and a little creativity, you can build a rustic trellis that supports climbing plants, improves privacy, and enhances your garden’s charm.
Instead of bundling your sticks for disposal, turn them into something living.
Your vines will thank you. 🌿