How to Build a Nutrient-Rich Garden Bed for Long-Lasting Plant Growth
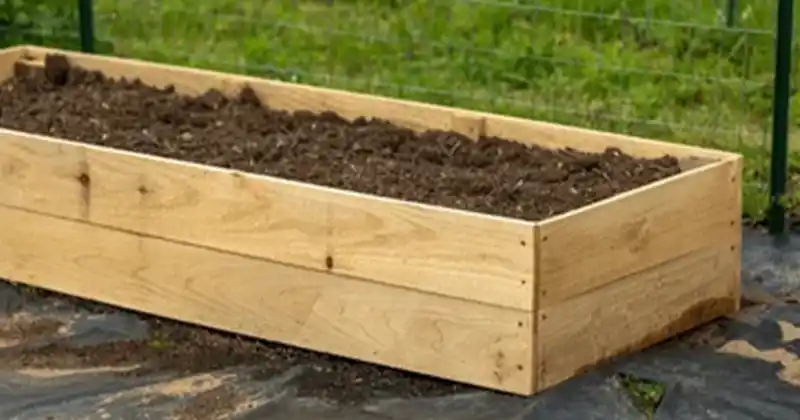
Creating a garden bed that retains nutrients and moisture is key to helping your plants thrive throughout the growing season. By building a garden bed that holds essential nutrients and water, you can provide a strong foundation for your plants, ensuring they stay well-fed and hydrated even in the heat of summer. Follow these step-by-step instructions to make your own nutrient-rich garden bed, and you’ll be set for a productive growing season.
Step 1: Preparing the Garden Bed Area
Start by choosing the location for your garden bed. Once you’ve selected a spot, you’ll need to dig out the area. Aim to dig down about 3 to 4 inches deep; however, the depth can vary depending on the materials you’ll be using. If you have larger logs to incorporate, you might need to dig deeper to accommodate them. Properly preparing the ground is essential to ensure that the bed is stable and capable of holding moisture.
Step 2: Laying Down a Weed Barrier
One of the most important steps in building a successful garden bed is preventing weeds from infiltrating it. To do this, lay down a layer of cardboard across the entire dug-out area. Be sure to overlap any gaps to eliminate spaces where weeds might find a way through. This cardboard layer will not only act as a barrier but also decompose over time, contributing organic matter to the soil.
Step 3: Adding Natural Materials for Long-Term Nourishment
Now it’s time to start building the base of your garden bed using natural materials. Begin with a thick layer of twigs, branches, and other organic matter that you can gather from your garden. If you have larger logs available, include those as well. Even kitchen scraps, such as uncooked vegetable peels and plant waste, can be added. This base layer will break down slowly, releasing nutrients into the soil over time, making it a crucial part of the bed’s long-term nourishment plan.
Step 4: Enriching the Soil with Bone Meal
Once your natural material layer is in place, it’s time to sprinkle some bone meal over it. Bone meal is an excellent source of phosphorus, which promotes strong root growth in plants. A light dusting is all that’s needed; just enough to cover the layer beneath. Bone meal also helps improve the overall fertility of the soil, ensuring your plants have access to essential nutrients as they grow.
Step 5: Adding a Quality Soil Layer
With the base in place, the next step is to add a layer of quality soil. If the soil in your garden isn’t ideal, don’t worry—this is your chance to enhance it. Use loamy soil, which is rich, crumbly, and excellent at holding moisture. If necessary, bring in some high-quality topsoil from another source. Spread the soil evenly over the base layer, making sure it’s level. This layer will serve as the primary growing medium for your plants, so take the time to make it as even as possible.
Step 6: Topping with Compost or Manure for Short-Term Nutrients
To give your plants a boost in the early stages of growth, finish the bed with a thick layer of fully decomposed compost or manure. This top layer will provide the immediate nutrients your plants need to thrive during the initial part of the growing season. Both compost and manure are packed with essential nutrients like nitrogen, potassium, and trace minerals that are crucial for healthy plant development. Spread this layer evenly to ensure consistent feeding.
Step 7: Final Enrichment with Neem Cake and Bone Meal
To take your garden bed to the next level, sprinkle some neem cake powder and another light layer of bone meal over the top layer. Neem cake not only enriches the soil but also acts as a natural pest deterrent, keeping harmful insects away from your young plants. The combination of neem cake and bone meal will ensure that your garden bed is primed to support healthy plant growth from the beginning to the end of the growing season.
Step 8: Allow the Bed to Rest and Settle
Once everything is in place, it’s important to let the bed rest. Allowing the garden bed to sit for at least 6 to 8 weeks is ideal. During this resting period, the organic materials in the bed will begin to break down, creating a nutrient-rich environment. Starting the process in early winter is ideal, as it provides enough time for the bed to mature before the growing season begins. The resting phase also allows microorganisms to start breaking down the organic matter, turning it into plant-friendly nutrients.
Why This Method Works
By layering your garden bed with a mix of organic materials, soil, compost, and natural amendments, you’re creating a self-sustaining environment that can support plant health all season long. Each layer has a specific purpose, from long-term nutrient release to immediate feeding, ensuring that your plants have everything they need for robust growth. The resting period allows the bed to settle, making it easier for plant roots to access nutrients as they develop.
Tips for Maintaining Your Garden Bed
- Watering: Keep an eye on the moisture level, especially during the first few weeks after planting. The organic materials in the bed can hold a lot of water, but regular watering will help maintain consistent moisture.
- Weed Control: While the cardboard layer helps with initial weed suppression, keep an eye out for any weeds that may appear and remove them promptly.
- Replenishing Nutrients: At the end of each growing season, consider adding another layer of compost or manure to refresh the bed for the next season.
By following these steps, you’ll create a garden bed that’s not only rich in nutrients but also capable of retaining water effectively, even during hot summer months. This method provides your plants with a robust foundation, leading to healthier, more productive growth. Happy gardening!
