How to Turn Walnut Husks into Natural Ink and Dye
If you live near black walnut trees, you are likely familiar with the large, round fruits that fall to the ground in autumn. While the inner nut is a popular food source, the fleshy outer layer—known as the husk or hull—is often ignored or thrown away as yard waste. However, these husks hold a hidden power. They contain a highly concentrated natural pigment that can be easily extracted.
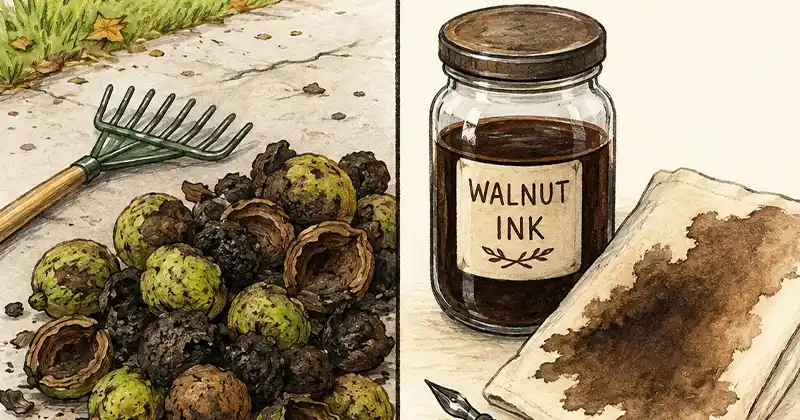
By using basic household tools, you can transform these discarded husks into a rich, dark brown ink. This natural ink is excellent for writing, drawing, and painting. Beyond ink, the liquid can also be used as a versatile dye for multiple home projects.
Essential Safety and Preparation
Before you begin handling walnut husks, it is important to understand how powerful the pigment is. The dark brown color will stain almost anything it touches. To protect yourself and your surroundings, follow these basic rules:
- Wear thick rubber gloves: The pigment will quickly turn your hands and fingernails dark brown, and the stain can easily last for several weeks.
- Protect your workspace: Cover your tables, floors, and counters with thick plastic sheets or cardboard to prevent accidental drops from ruining your surfaces.
- Use dedicated tools: Use old metal pots, spoons, and strainers that you do not plan to use for cooking food again. The dye can permanently discolor your kitchenware.
- Wear old clothing: Any splashes will permanently stain your clothes, so be sure to wear items you do not mind ruining.
Step-by-Step Guide to Making Walnut Ink
Creating your own natural ink is a straightforward process of boiling the husks to release their color into water. Here is how to do it efficiently:
- Gather the Husks: Collect fallen walnuts from the ground. You can use green husks, but husks that have aged and turned soft or black will produce a much darker, richer brown color.
- Break Them Down: Place the husks in an old bucket. If they are hard, use a hammer or a heavy stone to gently crush them. Breaking them into smaller pieces helps release the color into the water much faster.
- Soak the Husks: Transfer the crushed husks to an old, large metal pot. Add just enough water to completely cover the husks. Let them soak overnight to begin softening the material and releasing the initial pigments.
- Simmer the Mixture: Place the pot on a stove or an outdoor burner. Bring the water to a gentle boil, then immediately reduce the heat to a low simmer. Let the mixture simmer for at least one to two hours. The longer you simmer the water, the darker and more concentrated the resulting liquid will become.
- Cool and Strain: Turn off the heat and let the dark liquid cool completely. Once cool, pour the liquid through a fine-mesh strainer or an old piece of cloth (like a discarded t-shirt) into a clean glass jar. Squeeze the cloth firmly to get all the liquid out. You can now discard the solid husks.
- Preserve the Ink: Natural homemade ink can develop mold over time if left untreated. To prevent this, add a small amount of rubbing alcohol or a few drops of white vinegar to the jar. Keep the jar tightly sealed and store it in a cool, dark place.
Other Powerful Uses for Walnut Liquid
The dark brown liquid you just created is not limited to pen and paper. Because it is a highly effective and strong natural dye, it can be used for several other practical home projects.
- Natural Wood Stain: Instead of buying chemical wood stains from a hardware store, you can brush the walnut liquid directly onto unfinished wood. It penetrates deeply, giving the wood a beautiful, rustic brown finish. You can apply multiple coats to achieve a darker shade.
- Fabric and Textile Dye: You can use the liquid to dye natural fibers like cotton, wool, and linen. By soaking fabrics in the hot liquid, you can achieve earthy shades ranging from light tan to deep espresso, depending on how long you leave the fabric in the dye bath.
- Paper Antiquing: If you want to make new paper look old and vintage, you can lightly brush or sponge the diluted walnut liquid onto the paper. It will dry with a faded, historical appearance.
By taking the time to process walnut husks, you can create a reliable, high-quality product for your creative and household needs. It is a simple, cost-effective way to utilize natural resources that are otherwise left to rot on the ground.